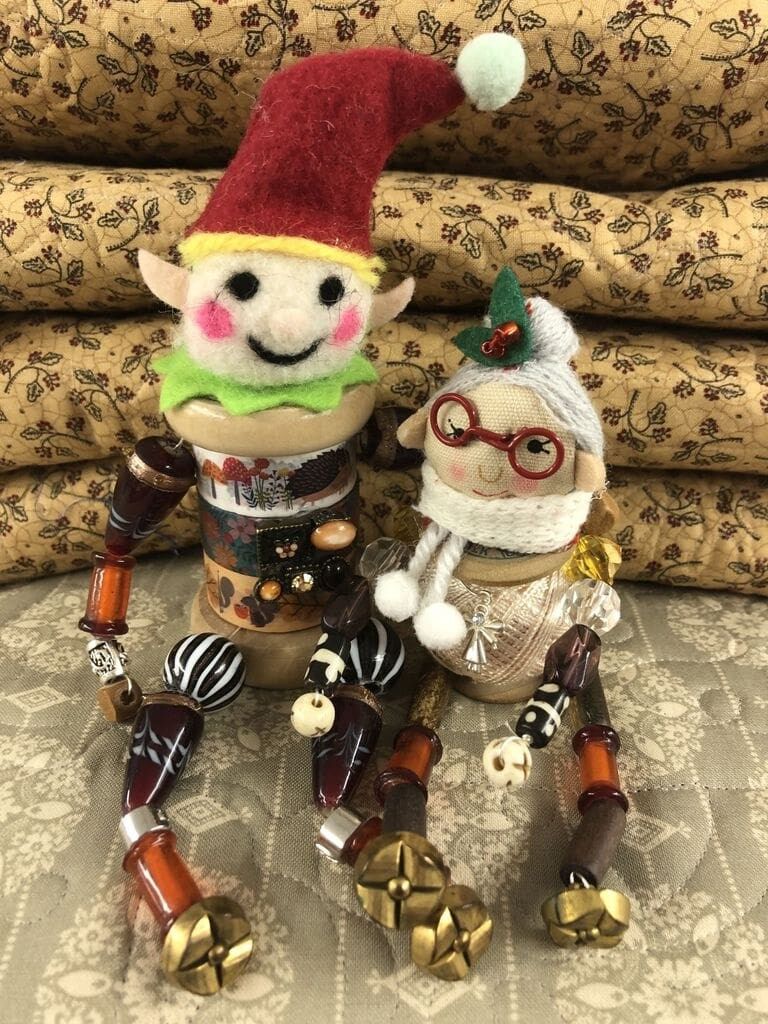
Meet Mr and Mrs Notions
(Instructions for making your own Mr and Mrs Notions at the end of post)
I’m currently in the process of finishing up over 30 customer quilts before Christmas, remodeling my kitchen, and working on three new books. You would think that this would be enough on my plate. Unfortunately, I have a serious case of “oh look it’s a squirrel” lately. (Hence Mr and Mrs Notions) For those of you who have not heard this term, it basically means I am easily distracted.
So, instead of working on all the things I should be working on, I started surfing the web and saw an add for “Elf on the shelf”. I’ve never really been a fan of Elf as he came along after my children were of an age to appreciate him, but it got me to thinking, what about a quilting version of him?
I started going through my notions and other quilting items I had laying around, and I have a lot of them. I hadn’t realized quite how many I had been collecting over the years, until I had to move them all to the new house, and have been trying to find ways to use them. This project was perfect.
Mr. Notions takes about 10 minutes to make, but I warn you he is addictive. I spent the next two hours finding fun cute places to hide him around the studio. Then, of course, I decided he needed a wife. I’m drawing the line at pets and children. I do have to get some work done. If you want to join in the fun, follow me on Instagram and post pics of your own Mr. Notions with #mrnotions. I will have some special gifts for the person who posts the most creative and fun picture.
For Mr. Notions, I bough a tape spool from Joanns Fabric. Mrs. Notions I used an old antique spool I had lying around. You will also need assorted beads/buttons, jewelry wire, hot glue gun, and a cheep ornament head.
Start by passing a piece of jewelry wire approximately 10″ long through a round bead or button. Twist wire to secure bead.
Thread “arm” beads on in desired order.
Wrap wire twice around top of spool. Going around “arm” once to secure. End with wire facing out for opposite “arm”..
Thread opposite “arm” beads on in the same order as first “arm”. Twist wire at end to secure “hand” bead.
Repeat steps used on “arms” to make “legs” and attach in the same manner. I then decapitated my cheap ornament and used the glue gun to reattach the head to the top of the spool.
Add any embellishments you want. I gave Mr. Notions a Steampunk belt buckle and Mrs. Notions an angel necklace.
This time of year can be lots of fun, but it can also be stressful. Take some time for yourself and just do something fun. Cant wait to see what everyone comes up with.

Very clever, Kris!